I've been very busy lately. So busy my brain is too fried to even come up with a cliche for how busy I've been.
One of the things that has been taking up my time is this work in progress. When finished, it's going to be the bestest custom craft-storage thingy ever. After, gads, three weeks? I hope to finally have it finished tomorrow. But hopes and reality often don't mesh, so we'll see ...
After my re-decorating of our kitchen this Spring, I claimed the table and surrounding area for a craft area. We never actually eat in the kitchen and having nowhere else to set-up, well, the kitchen it was. This is what my "craft corner" looked like then:

Yes, the table is an eyesore, but after years of abuse as a craft table, that's what happens. So until I decide what to do with it permanently, I'm just going to throw a table cloth over it. ;)
Anyway, my "craft corner" doesn't look like that anymore. It's messy now. Very messy. Thanks to my extremely generous Aunty Moe I have accumulated a grand amount of wonderful claying goodies. Wonderful stuff, delightfully colorful bottles and jars of assorted powders and paints that inspire me on sight. Except, they are all over my table, leaving little room to actually work and offending my sense of aesthetics. Something had to be done.
A few weeks ago, we're driving up the alley the night before garbage pick up. I will admit right here and now - I have no shame - I will pick up "curbside finds". One man's trash is another's treasure right? I like to call these finds "reclaimed goods". So we're driving along and spot this piece out for pickup. Either a hutch top or maybe a headboard thingy for a kids bed set, don't know, but it was in great shape, absolutely nothing wrong with it, and it had cubby-holes! Cubby holes! I want that! I can put it on top of the table to use for craft storage. My other-half agrees so we take it.
The piece was your typical heavy pressboard type piece with every surface veneered and laminated to look like white-washed oak. I can deal with it as-is and would have put it on the table right away but Other-Half decides it needs a major overhaul. He wants to make drawers for it so that all the cubby-holes are more practical. Sounds good to me.
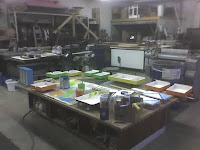
So we take the piece to his brother's workshop where we have room to, well, work on it. Let the games begin. We decide along with making drawers, the whole thing needs to be painted. And painting means also having to sand it all first 'cause painting over slick veneer is not an option. So first, the whole thing has to be dismantled. Ever-thinking Other-Half decides a paint spray gun will be more better efficient than brushing. I agree. So off we go to our storage unit across the river to get our spray gun. Back at the shop, I have 18 zillion now-sanded pieces to cart outside for spray-gunning. Now, pneumatic paint spray guns kick out a lot of air so you have to have your pieces well above the ground so dirt and leaves and what not is not blown up into your wet paint. So that means gathering all sorts of what-nots from the shop and carting them outside to set up make-shift above-ground tables to put the dismantled pieces on. THAT done, we get to spraying. Then there's nothing to do but wait for paint to dry. And while the paint is drying, every gnat within five miles as well as a two bees and six flies, decide to land in my wet paint. Sigh. Now I need to buff out the bugs and dust everything down between coats. We have to take all the pieces and all the what-nots that make up our make-shift tables back into the shop each time we're finished for the day. And dis-assemble and clean out the spray gun each time. And then bring out and set up everything again the next time. So the first step of base-coating became a dreadfully time-eating process.
Some eons later, we have that done. Other-Half re-assembles the now solid-white pieces into their former state of wholeness. I decide this thing is NEVER getting taken apart again so decide it'll be a good idea to fill all the screw holes with wood goop so I can paint over them. Great. Except that means waiting for the goop to dry, then sanding it, then, sigh, painting all those areas again, then, sigh, waiting for THAT paint to dry.
Meanwhile, Other-Half is contructing the drawers and trays to fill the cubby-holes. This involves clamping and gluing, which, you guessed it, means more time waiting for glue to cure. The there's more wood goop to apply to fill imperfections left from assembling, waiting for that to dry, and finally, sanding it all down. Whew!
So we finally get to the point where I can begin top-coating everything and me being me, I have to do it in four different colors. Five if you count white. All the drawers & trays need base-coating in white first, then color. This means lots more time waiting for numerous coats of paint to dry. This make-over could have been done in two days if it weren't for all the WAITING time. Plhppp. Patience is not a virtue of mine.
So, here is the main piece, re-assembled and painted:

and here is the painting-in-progress of the drawers:

Tomorrow, I hope to have the painting finished and the drawer bottoms lined, and that'll be that, we can finally put this baby to bed and move on to other things. I can't wait.



![[Beatnik Bubbles] Bath Towel Set](https://rlv.zcache.com/beatnik_bubbles_retro_polka_dot_striped_rainbow_bath_towel_set-r6ff2efcc40994c988ffa9c029a606789_ezaga_550.jpg?rlvnet=1 "[Beatnik Bubbles] Bath Towel Set")
![[Geometric Tie-Dye] Acrylic Coaster Set](https://rlv.zcache.com/peace_sign_geometric_rainbow_tie_dye_acrylic_coaster_set-r0267d5072cb246fc8dae868f4ecada8c_0mkpe_550.jpg?rlvnet=1 "[Geometric Tie-Dye] Acrylic Coaster Set")
![[Atomic Tie-Dye] Stone Coaster](https://rlv.zcache.com/atomic_tie_dye_rainbow_colors_peace_sign_symbol_stone_coaster-rd9f36a3b29564c25a5d2c8d7807c6b6f_zxeh9_550.jpg?rlvnet=1 "[Atomic Tie-Dye] Stone Coaster")
![[Harlequin Tie-Dye] Accent Pillow](https://rlv.zcache.com/harlequin_tie_dye_diamond_fractal_checkered_v2_throw_pillow-re2dab7a710ca40c19e8721db2ac89a5e_6s309_8byvr_550.jpg "[Harlequin Tie-Dye] Accent Pillow")
![[Painters Cloth] Espadrilles](https://rlv.zcache.com/painters_cloth_distressed_rainbow_tie_dye_espadrilles-r9c66833b65fd4649b2de6ad464abf10e_012y1_550.jpg?rlvnet=1 "[Painters Cloth] Espadrilles")


