2 weeks ago
Wednesday, November 16, 2011
Wire Choker Necklace
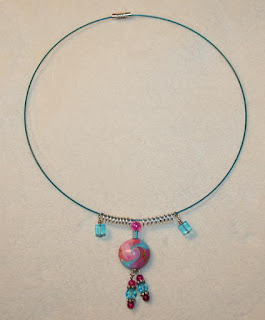
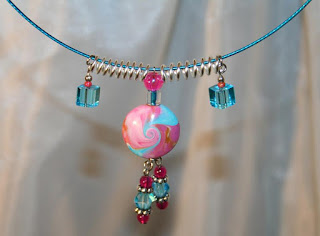
If I told you how long I spent on this you would think I have the IQ of a grasshopper so I'll just say, I am very happy with this!
Friday, October 28, 2011
Picked a Peck of Peppers
Here it is, only October 28 and they are calling for 6-10 inches of snow here this weekend! So we decided we best go pull the last of our peppers for the year. |
Go Cards! And go away, Snow!
Saturday, October 15, 2011
Saturday, September 24, 2011
Tuesday, August 16, 2011
WARNING
I noticed a new Follower on my blog today so clicked their picture (down there under "Who's Following Me") to see who they were. I went to their blog they had listed and was taken to a Spanish-language BlogSpot blog that looked like a legit clay-related blog. Except it was loaded with ads and pop-ups that my blocker didn't stop and now I am infected with some malware crap. The follower/blog name is "MOMENToCOMPLEMENTo". Until I find a way to remove this "Follower" from my blog, please do not click on them to visit them. Uhm .. anyone know how to remove an unwanted Follower from your blog?
Wind Chime Rescue
I love wind chimes. Even the ones that don't actually make any noise, the purely decorative ones I call "porch danglers".
This one here made a lovely delicate little sound but it didn't take a wind much stronger than a sneeze to tangle the streamers up something awful. Then we had a storm come through which blew this one down, breaking some of the discs and leaving the rest tangled beyond hope.
So I decided to re-do it, my way, and hang it indoors.
First I made swirly accents out of copper wire to add some "oomph" to the discs.
Then I re-strung it, adding nice glass beads plus fishing sinkers to the bottom to weigh down the "streamers".
I intended to hang it on the orange wall of my kitchen/craft-corner but it looked a bit lost there. So I think I will just leave it here on the window.
So that's it. A relatively simple rescue-project with a result much better than the way it came from the store. And look - the main copper part is my initial. :)
Sunday, August 7, 2011
Image Transfer Tutorial
Ok then .. If you all remember, my last big project was making polymer clay "Helping Hearts" as I dubbed them and using image transfers to put a logo on the backs of all of them. I previously blogged about my trials & errors thus far with image transfers and promised when all was done I would write up a "tute" on how I finally ended up doing it. This is that tute.
As I did not want to attempt transfers on soft raw clay, my first step was making and curing all the hearts. I made the hearts in layers so they would all have a nice white back to put the logos on. After curing, I sanded them, giving extra attention to the backs so as to have a very smooth surface for the transfers.
On to the tranfers ... First step is printing your image which is not as easy as it sounds. You want to size the image right to fit your project, and, you want to fit as many images on one sheet of paper as you can as the paper for this is not cheap. I used Avery Light Fabric Transfers paper. Note this paper is designed for use with inkjet printers, which is what most home printers are, so no need to run to a copy shop to use a toner-based printer. My cost was $2 per sheet. Not going to break the bank but not exactly paper you want to waste either. I then used PhotoScape to get about 70 logos per sheet for printing. Took some trial and error there to get the image size and PhotoScape settings just right, but, it's a free program and the best for this purpose of the many I tried. My logo included text, but I printed the image normally. I did NOT make it mirror-image. That reverse-imaging when printing is not necessary with this method.
I cut my sheet into strips and applied a coat of Kato Liquid Polyclay clear medium. (I'm not endorsing PrairieCraft, I have no experience with them, they just had the best product page, LOL)
I had read that you should brush the liquid clay (LC) on in a very thin layer, and do it in two coats, brushing a different direction each time. I found that un-necessary, and, brushing it on very thinly did not work well at all for me. I got much better results brushing it on "normally". In other words, I did not knock myself out trying to get an uber-thin coat, nor did I slop it on thick.
I tried a number of different brushes and got the best results with a somewhat stiff, straight-edged nylon brush. The firm, straight brush and a firm stroke let me apply the LC evenly and smoothed out bubbles at the same time. When brushing on the LC, make sure you cover the entire piece of paper you are working with. Having a straight clean "edge" like that will make peeling the paper backing off much easier. Thus why I cut my sheet of images into strips.
As you can see from the pic, I am very messy when it comes to anything involving a brush so I always work on top of paper I can throw out and replace as often as necessary to keep my work area from becoming a sticky mess.
After applying the LC I baked the strips at 255* for 15 minutes. I placed them on a file folder on a metal cookie tray and used magnets to hold down the ends of each strip, to prevent them from possibly curling up while baking. I also tented the tray with foil. (It took me much trial and error to arrive at a suitable temperature and since ovens all have their own quirks, please experiment on some junk pieces first if you are going to do this, to find the temp that works best for your oven.)
After removing from the oven, I slid them into a pan of ice water. The strips curled up almost immediately upon hitting the water but it's just the paper curling so no matter, it doesn't hurt a thing.
After they are cooled, simply peel the paper backing off.
Isn't that GREAT? No soaking and scrubbing to remove all traces of paper, it simply peels away!
After I had all my strips baked and peeled, I cut the logos apart and trimmed them. I trimmed very close to the edges of the image as I saw no reason to leave excess LC around them.
Now I have cured hearts and cured liquid clay transfers. Perfect! This means I do not have to worry about mushing or marring the raw clay piece or smearing the ink or any number of other possible problems that could arise from working on raw clay and wet ink and un-set LC. All I have to do is stick them together. :)
So, using the same brush as above I brushed a very thin coat of LC onto the backs of the transfers. This time, you do want to go as thin as possible, just enough to make the image stick to the surface of your piece. Then stick the transfer, wet side down, onto your piece and press firmly, using your fingers to smooth it from the center out, to make sure you have no bubbles or wrinkles. If you use too much LC, the image will slide around as you press/smooth, so as I said, use just enough LC in this step to make it stick, and be sure to cover the entire back of the image.
With the image in place, I brushed a thin layer of LC over the entire surface. In other words, I covered the entire back of the hearts, not just the image transfer area. I then baked again at 255* for 10 minutes, dunking them in ice water when they came out of the oven.
After cooling, I gave the backs another sanding with 800 then 1000 grit wet/dry paper. One of the best things about this method is that the ink is protected under two layers of LC so it is not going to rub off, or even sand off. (Unless of course you go at it with 60 grit paper or something, LOL.)
At this point, they are done. Finished. Good to go. :) Fully cured and the ink safe under the LC. But, I am obsessed with things being shiny, so I choose to apply a coat of high-gloss glaze to the backs. LC, if a high enough heat is applied to it, will turn shiny and glass-like on its own but that requires great care not to burn or bubble things. Playing with the heat gun is fun, but for a mass-production situation like this, I took the easier/faster way and used the glaze.
And here are my finished pieces (before I applied the glaze):
Crisp, clear images & text and great color transfer. No scrubbing paper off. No messing with mirror-images. No need to go to a copy shop to make your prints. No worries on the image rubbing off. No worries on mushing the piece out of shape or smearing the ink as you work. Three rounds of baking, yes, but the benefits of this method far outweigh that methinks.
So that's it, that's my method. I read many tutorials on doing image transfers before I embarked on this project and every one was different. I took a little of this and a little of that and experimented until it synthesized into one successful start-to-finish method.
Friday, August 5, 2011
MoeSmile Beads Necklace
This necklace started down at the river one evening. I practiced twisting wrapped loops while the Other-Half fished. He ended up with a nice stringer of catfish and I ended up with a bunch of little copper sticks with wrapped loops on one end.
A week or three later I spent the day with a friend, getting hands-on help with learning some basic wire techniques. I have books and a computer and a long-distance tutor but I just wasn't "getting it". Somewhere between looking at a picture of a step and my hands actually doing it, things get garbled. Like most people I suppose, I learn much better with a live example to follow.
So feeling inspired and much more confident after my "class" I went to work on making something out of those wire sticks.
First, I picked out some beads and made a number of segments, like this:
Then I needed a way to connect them so I made a pile of jump rings and used two at each link up. (OK, OK, jump rings were the easy way out here, but it worked and I like the way it looked.)
Here's the end result, a long necklace with largish beads on copper wire. I like the copper with the orange beads. I did not make the MoeSmile beads, by the way. They came to me as a gift and were gifted back to the giver in the shape of a necklace. ;)
Did you notice the unique clasp on it? Here's a larger view of it:
I was looking through my collection of store-bought clasps, not liking any of them. Too flimsy, too hard to fasten, wrong color ... and in a flash of insight and inspiration said to self .. why don't I just devise my own clasp? This is what I came up with. Cool huh? I'm pretty proud of me for thinking that up.
Actually, I'm pretty happy with the whole thing. :)
And in case anyone is wondering what happened to the catfish, we gave them to neighbors. I'm from the Midwest where catfish seemed to be on everyone's menu, but here in the Northeast, not so much. I don't think I've ever actually seen catfish on a menu here. Which is fine by me, much better fish out there to eat. ;)
Wednesday, June 1, 2011
Helping Hearts 2011
My latest project, now complete: 100 polymer clay hearts, approx, 1.5 x 1.5 inches, made and sold to help raise money for the American Cancer Society.
You can visit my photo gallery HERE to see all of the actual hearts.
This year I decided to put the logo of "my" Relay For Life team on the backs of all of them, using liquid clay and an image transfer technique. I had more trouble with that then I counted on, almost gave up the idea, but stuck it out and worked it out and think they came out fabulous if I do say so myself. :)
I also decided to use several different colors for the awareness ribbons this year, instead of just periwinkle. The different colors were a success as it turns out everyone has their "pet" cause that means something to them, and they want the color to show it.
My regular readers (HAHA!) might remember that I posted a while back about my experiences thus far with image transfers. Well, after many more fits and starts I finally worked out something that worked for me for this particular project. I'll be posting soon about how I ended up doing it, mostly so I don't forget myself. ;)
For now, I'm off to practice more on making wire loopdeloops.
Sunday, May 29, 2011
Adjustable Length Cord
My friend JoAnne taught me how to do this and I think it is just ingenious in its simplicity. If making a pendant on a cord, you don't have to worry about how long to make it with this "trick". How great is that? One size really will fit all. :)
And so simple to tie, even I can do it. :)
Take the left end of the cord and tie a simple slip-knot around the right side of the cord. |
Pull the knot tight, using your thumb to "push" the knot along so that only a small tail is left. |
Now take the right end and do the same thing: tie a simple slip-knot around the left side and pull the knot tight. |
You'll end up with something like this. To shorten the necklace, pull the tails away from each other, at same time. To lengthen it, pull the sides away from each other, at same time. |
At its longest length, you'll have a "single strand" cord and the knots will be touching each other at the back of the necklace. |
And so simple to tie, even I can do it. :)
Tuesday, May 24, 2011
The Empty Box
We needed a few boxes so stopped at the liquor store where they always have mountains of them for the taking. The liquor store is the best source for free boxes if you don't mind all the advertising on them. It's also the best source for booze and beer. And wine if you're in to that kind of thing. ;)
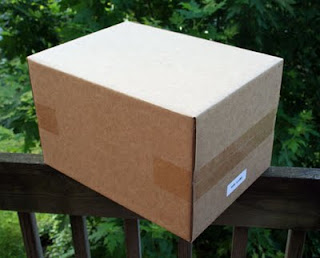
So we're rooting through the pile and .. what's this? A perfectly pristine plain brown box. Completely sealed, and completely empty.
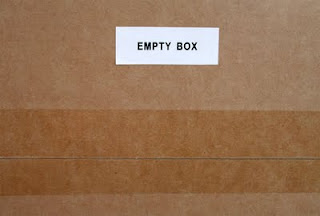
And conveniently labeled:
!!! The box sits in my office now as it makes me laugh every time I look at it. I'm sure there's a logical explanation for this but I don't want to hear it. I prefer to revel in the absurdity of it.
Saturday, May 21, 2011
Best Deal Ever
Wow!! God's autograph is going for a minimum of $75 on eBay right now but with this deal you get a bible AND the autograph for a mere $50.
(Yep, from the same local classifieds that brought us "Call Ed".)
Sunday, March 20, 2011
Sew This Will Be Easy ...
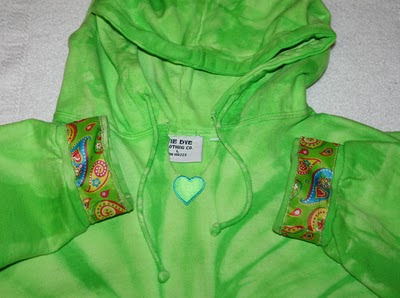
A while ago, a friend gave me this great hoodie. Neon lime green with a subtle tie-dye pattern on it. Most excellent! Delighful as it was, I decided I had to "enhance" it a bit. Partly because she has an identical one, and partly because I have a reputation for personalizing my jackets and shoes, so ya know, wouldn't want to let people down ;) When I start looking like Mimi, someone stop me!
First thing I had to do was slice the neckline open. More convenient when pulling it on or off, and I just like the way it looks. But for reasons best left unsaid, I ended up with not just a slice, but with a u-shaped section of fabric actually cut out. I just happened to have a heart shaped patch in a matching color so I sewed that onto the wider-than-wanted opening.
Now, I have zero skills when it comes to needle & thread crafts. None. So I got this nifty "invisible thread" to use, to hide my messy amateur stitching. For anyone who doesn't know, this is what invisible thread looks like:
See? It doesn't look like anything because you can't see it! Sewing with this stuff is a total nightmare, but I got the heart on without too much hair loss.
That should have been good enough but I found some ribbon in my ribbon-drawer that I thought would be just dandy on the hoody. Why does someone who can't sew have a drawer full of ribbon? I don't know for sure but I think it just jumps into my basket at the craft store all by itself.
So I decide to sew a length of ribbon around each cuff. Easy right??
I begin by carefully measuring out a length of ribbon and sewing one end of it all the way across the width of the cuff, securing it in place so I can sew the edges all the way around the circumference of the cuff. After several hours and much hair-pulling and cursing, I finally get one edge of one cuff done. Pleased as punch with myself, I put an arm though the sleeve for a test-look. Oh %#&$#@! I can't fit my hand through the cuff now!
Turns out that cuffs stretch to let your hands through but ribbon doesn't. Did my amateur self think to allow for the stretchiness factor? So I get a seam-ripper gizmo out and set about undoing my progress. And let me tell ya', even with a magnifying lamp, ripping out invisible thread is just as hard as stitching it on!
Back to where I started, ripped back off except for the starting end seam, I need a break so fire up the Instant Messenger and tell my Mom and Sister my tale of woe. My sister, in her practical, logical. problem-solving way, says "Can't you just buy a ribbon that is stretchy?". Thanks for the assisterance (get it?) but I want to use THIS ribbon. WAHHHH!
Frustration now vented, inspiration strikes! I will put a can inside the cuff to hold it stretched open enough to get my hand through, then sew. How smart am I right? I end up with a can of dog food that is just about the right diameter and begin sewing again. With the can in there, it's extremely difficult to poke the needle through the fabric, especially since my fingers don't know what they are doing anyway, but several hours later, I've made it about half way around one side of one cuff again. It is at this point that I realize, $%#@&, now that the cuff is stretched out a bit, the ribbon is now too short!! Back to the seam-ripper. Sigh.
I put the project on hold until I can waylay Snake-Lady and ask her advice. Snake-Lady is the nice upstairs neighbor who I know used to sew her own clothes. She tells me, well, for starters, I'd do it on a machine ... OK, I am not on good terms with my sewing machine, and even if I were, I can't fathom how I'd do it without sewing the sleeves shut as the cuffs couldn't possibly stretch around the base of the machine. So hows about telling me how'd you do it if you were going to do it by hand? Her advice is to stretch it around the can, pin it, take the can out, then use my fingers to stretch it from pin-to-pin while I sew.
Sounds reasonable so after a day or two's vacation from this ordeal, I start again. Now, I am predominantly a "lefty", but like most lefties, I am also rather ambidextrous. Which means if something doesn't come to me naturally I will use either hand until one learns what it is doing, or I will use whichever hand is most convenient to the task. Like painting in a tight corner or whatnot- easier to switch hands then contort to fit the space. So with the cuff pinned and can removed, I am struggling to hit on something that feels natural. Stretch with right, needle in left? Nope. Stretch with left, needle in right? Nope. Nothing feels natural and it seems as though one needs super-hero strong fingers to stretch the fabric as you manipulate the needle with the fingers of the other hand. AHHH! I need three hands! And the invisible thread constantly getting caught on the pins now in place is not helping matters!
But I persevere. And my Other-Half, watching me go bananas, asks "Why do you keep using that invisible thread if it's making you so crazy?". I reply, "Because my stitching is way out of whack so I don't want anyone to be able to see it". He says "Well, maybe if you used a thread you could actually see to work with, it wouldn't BE out of whack". Uh, Good point, Kemosabe, I'll keep that in mind if I ever attempt another sewing project.
Elated to FINALLY be done with what was supposed to be a quick & simple little project, I fill my Mom in on the outcome. "Pins?" she says, "I could have told you to pin it but it never occurred to me that you WEREN'T using them".
Was it worth the time and tribulations? Heck no! But I will wear this thing to my grave now!
Sunday, March 13, 2011
More Hearts
After the first batch of "Helping Hearts" I received a commission to make 10 hearts (no ribbons) that were going to be given as gifts. I had a lot of fun with this batch so got a bit carried away and ended up making 35!
You can see all 35 here: Hearts Gallery
I took all 35 to the woman who commissioned the 10 and let her pick her favorites. Then I put the periwinkle awareness ribbons on the remaining 25, and sold them, too. Proceeds to benefit me, LOL.
This batch was all hand-sanded and buffed to a high shine. Using a glaze is a real time saver for "mass producing" but I still prefer the natural shine from buffing.
Helping Hearts - 2
Back in May 2010 I came up with the idea for "Helping Hearts". They were a much bigger success than I expected and raised over $300 for the American Cancer Society. You can read about those hearts here: colscreations.blogspot.com/2010/05/helping-hearts.html
In December I made another 50 to be sold at a fundraiser for the same Relay For Life team, proceeeds of course going to the ACS.
For more pictures you can click here: Gallery - Helping Hearts 2
For these hearts I used a glaze (Air-Dry PermEnamel Clear Gloss Glaze by Delta) instead of buffing them as I did on the first set. Huge time saver!
The image transfer technique I have been working on is so that I can put a logo on the next batch - Helping Hearts 2011 - due out in May if all goes well. ;)
Wednesday, March 9, 2011
The Chicken Dance
Two vastly different products sold in exactly the same form. Want to guess what happens when the one on the right is accidentally used on the sensitive underarm areas instead of the one on the left? |
If you guessed jumping around flapping your arms like a mad chicken for twenty minutes, you would be right. You definitely don't need any morning coffee afterwards. Trust me.
Tuesday, January 18, 2011
Image Transfer, Part II
Next step - how to get the image transfers, which at this point are like thin rubber sheets, onto an actual clay piece?
Two problems to overcome. First, the transfers are translucent. So to make the image really "pop" it needs to be over a light colored surface. And since white is not an ink color but rather an absence of ink, any white in an image transfer is actually just an empty area that will go from translucent to transparent when properly heated. So to keep the white in an image, the surface you apply it to needs to be white. But what if you don't want your finished piece to be white? That would be pretty boring, if everything you made with transfers had to be white!
With that in mind, I decided to put a thin white backing on my transfers so that I can then apply them to any color surface and not lose the "pop". Or the white where it should be white. So first I made a sheet of Premo white, #5 on the pasta machine. After carefully trimming the transfers I laid them over the white sheet, cut out the background shape I wanted, then removed the transfers. I then baked the white pieces and sanded the tops, to get a very smooth surface to apply the transfers to.
To permanently adhere the liquid clay transfers to the cured white clay, I need to use a thin layer of liquid clay as "glue" to form the bond. Now here's where dilemma #2 comes in. The white backing bakes at 275*, any higher and it will most likely burn. (Will definitely burn, I should say, as I tried it at 300. I had to see for myself.) But the liquid Kato, according to the manufacturer's website, should be baked at 300* for 20 minutes to get a matte finish, then at 350* for another 10 minutes to achieve crystal clarity. What to do, what to do ....
I ended up doing it in two steps. First I brushed a thin layer of the liquid Kato onto the backs of the transfers, smoothed them onto the white backings and baked at 275* for 15 minutes. That gave me a bond without burning anything but left the surface of the transfers very dull and matte. I still need to get the liquid clay hot enough to clear it up and make it glossy. Without burning the white clay.
So I got the heat gun out and did a couple of pieces without applying any more liquid clay. That did not work out very well as the exposed white Premo clay areas burned. I was pretty sure that would happen but had to try it anyway.
With the remaining pieces, I brushed a layer of the liquid clay over the entire top, hoping that would protect the white Premo areas from the heat gun, and it did! Was able to clear up the liquid clay and get a nice glossy surface, with no burning.
The cured pieces are thin enough they can be still be trimmed with scissors if desired (though next time I will make the backings thinner, as thin as I can) and are ready to be made into ... somethings.
As I continue to go along, I am sure that I will be able to shorten this process, combine or eliminate steps, etc. But for now I am happily moving along, learning as I go. Which by the way, here are a few things I have learned so far.
#1) Most tutorials I have read re using liquid clay say to apply it in very thin layers, cure, and repeat if desired to build up thickness. When I brushed it on as thin I could, I did not get very good results. It ended up with a sort of crackly texture. I got better results applying it a bit thicker.
#2) I have also read that if you let the liquid clay sit for a bit (after brushing it on) before heating it, it will help it "seek its level". So I let a few pieces sit
for about 20 minutes. I did not get results with that; the liquid clay sort of contracted, leaving "naked" areas all along the edges. So I had to add a little more to work it back out to the edges.
I've experimented in the past but failed to note anything I did, assuming I would remember the do's and dont's I'd learned later. Not so! :( So this time I am noting what I am doing. Makes for very boring blog posts, but lets me remember what I did. ;)
Friday, January 14, 2011
Image Transfer Trials
Images were printed on an HP Photosmart Plus inkjet printer and I used Kato liquid clay. Except for as seen in #3 where I tried TLS. The Kato looks a tad bit sharper, and I thought the Kato was easier to brush on. Which is what I did - simply brushed a thin layer of the liquid clay onto the image, then baked on a cookie sheet.
With the first and second tries, after the clay cooled, I let the paper soak in water for about 10 minutes, and then worked on scrubbing the paper away. NOT fun. And not practical for doing lots of pieces. And took the ink off with the paper.
On the third try, with the Avery transfer paper, I dunked the papers in ice water immediately after removing from the oven. But I only let them sit for about a minute. I wanted them to cool quickly but did not want the paper dissolving into a mess that would be hard to remove. So after a quick dunk, I peeled the paper right off - no scrubbing and great color transfer. Hooray!
The Avery transfer paper, I bought it at Walmart. Came in a pack of six 8.5 x 11 sheets for $12. At $2 a sheet, I didn't want to waste paper, so the hardest and most time-consuming part for me was trying to fill a sheet with multiple images, at the sizes I wanted them. I must have 30 different image-type programs on my computer but none of them seem suitable for this task. So after one test sheet I ended up putting the actual transfer sheet through the printer 4 times at different positions, to try to fill all of it. Gott'a be a better way.
Anyhow, that aside, I think this transfer method was pretty fast and simple. My next step now is to actually apply these transfers to cured pieces. That step scares me as I'm not sure of the proper baking time or temp to get them crystal clear without burning them. So uhm, suggestions/advice welcome ... ;)
Sunday, January 9, 2011
Tie-Dye For Tots
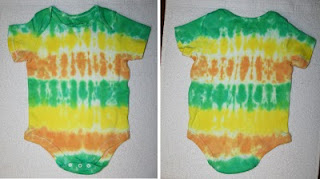
Some teensy little tee's and some "onesies". I did two pairs of baby socks, too, but they didn't come out. :( The dye did not take to them properly. Not sure why as I thought they were 100% cotton. But here's the shirts:
How cute is that?! The perfect spiral tie-dye. :)
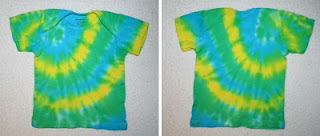
Three color bulls-eye. | Another three color bulls-eye. |
Spiral onesie. | Bulls-eye onesie. |
Another bulls-eye onesie. | Pleated onesie. |
Subscribe to:
Posts (Atom)